Follow Me On Social Media!

Jam Bars: Irresistibly Easy Treats for Your Sweet Tooth
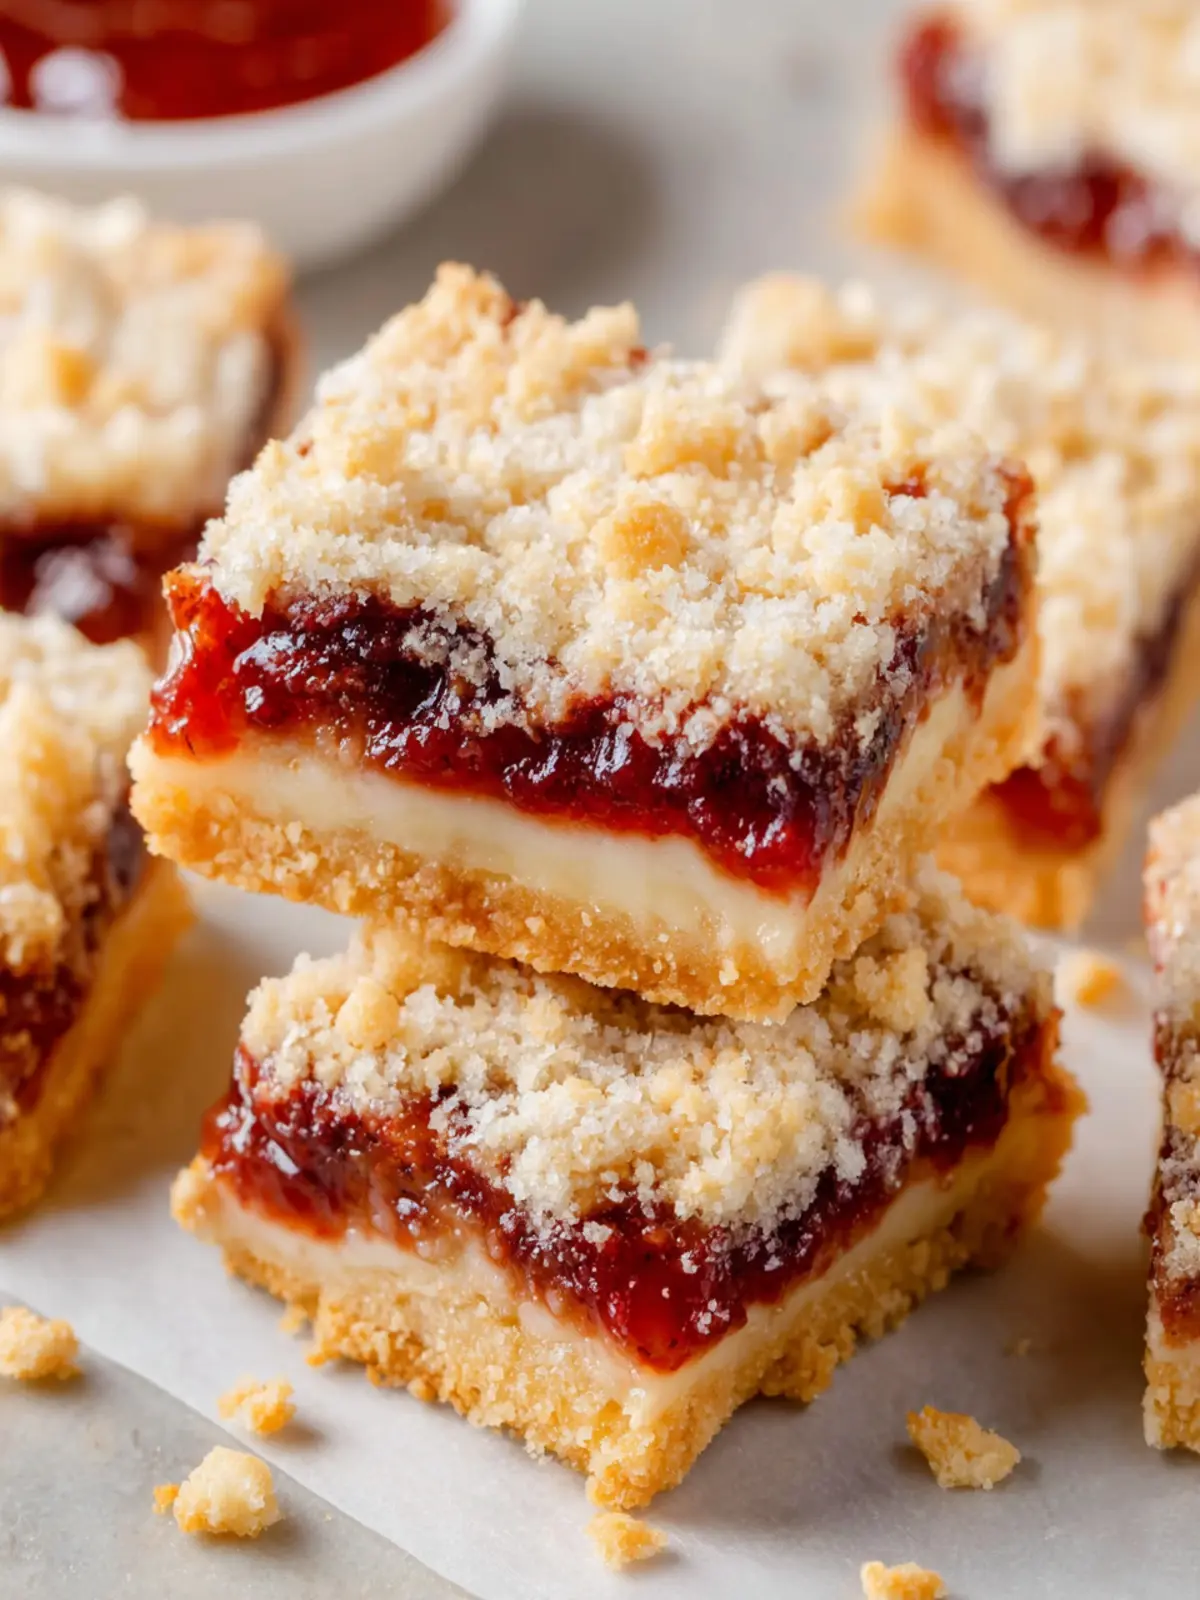
Introduction to Jam Bars
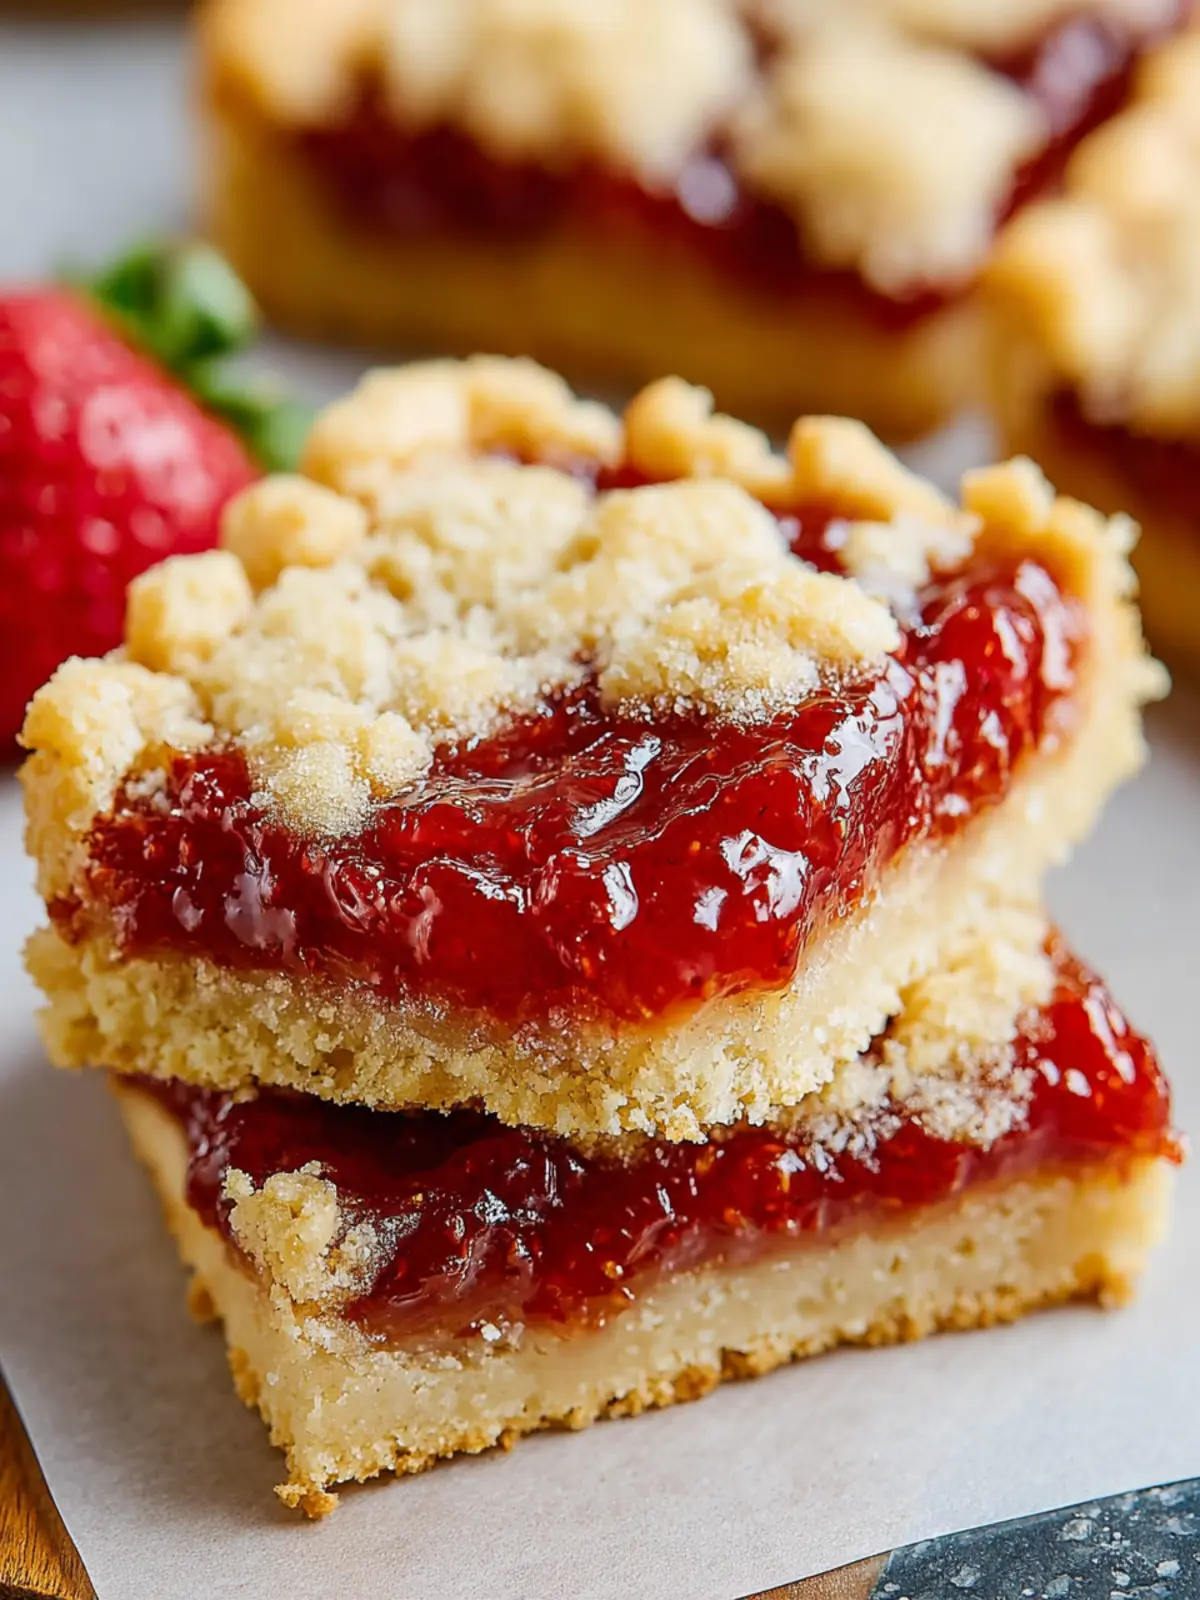
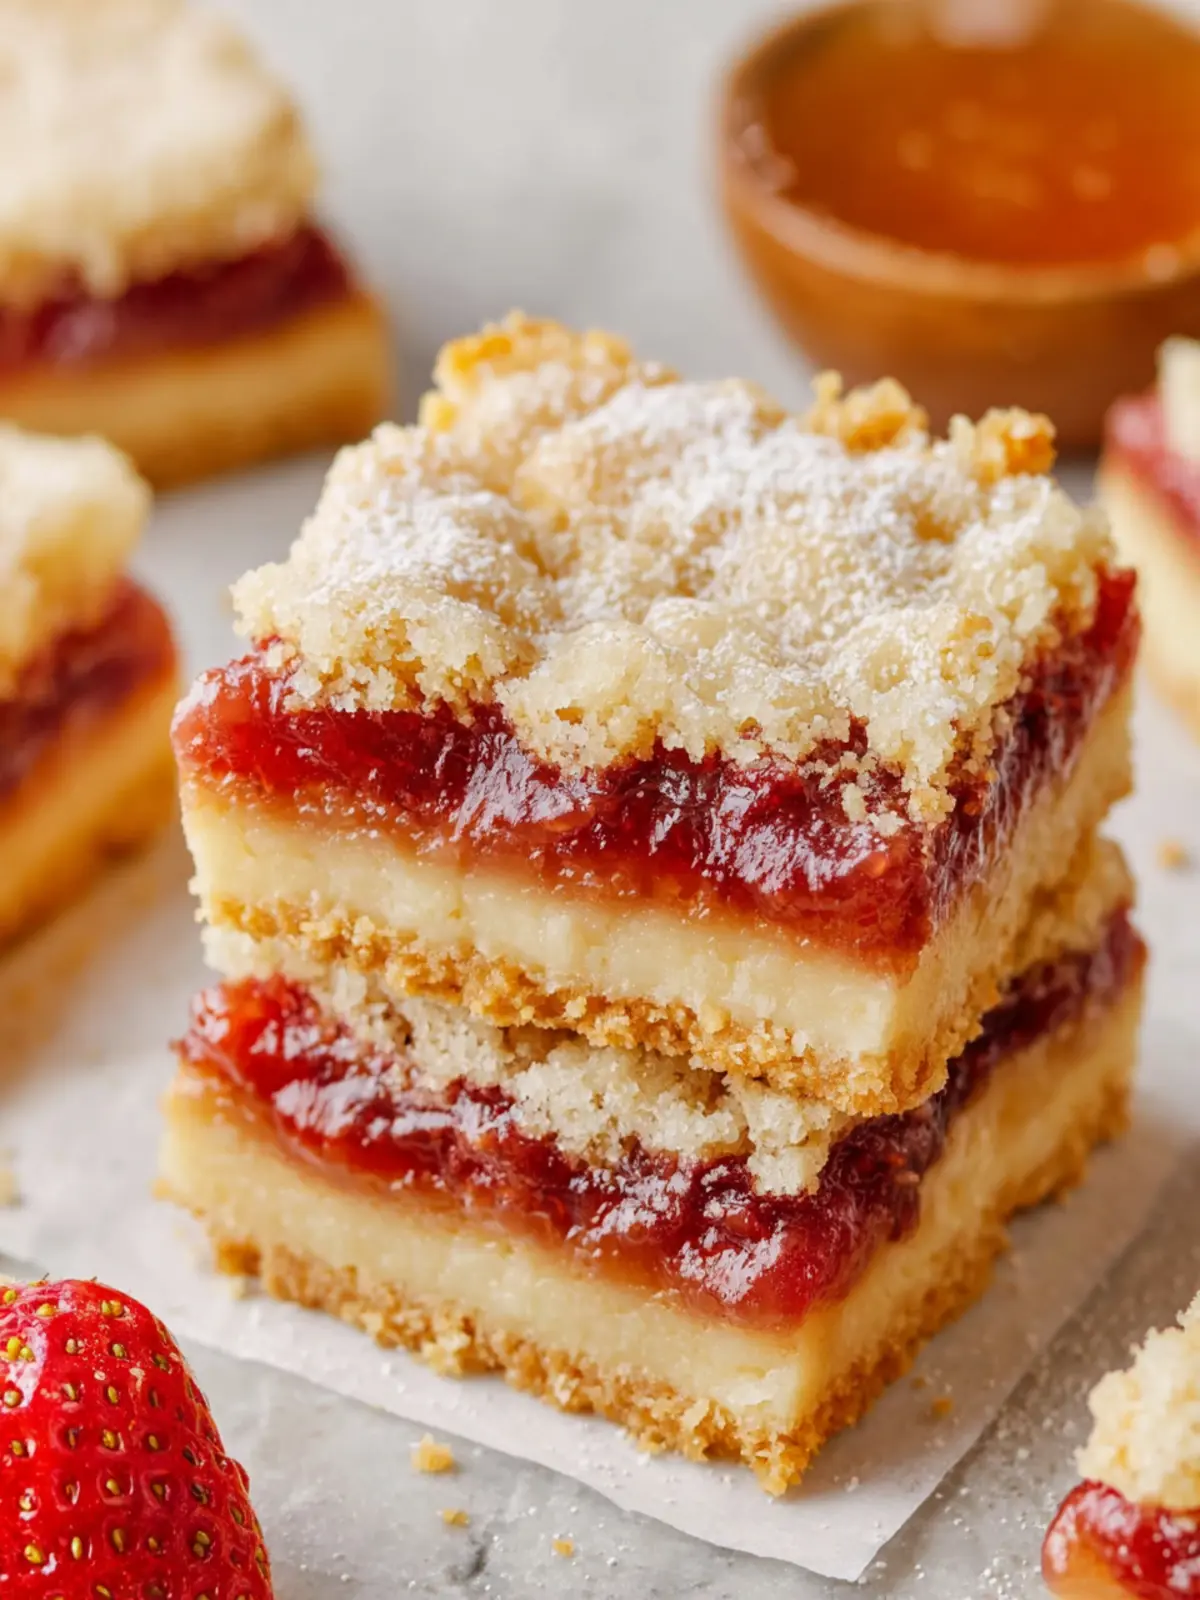
Imagine biting into a sweet, buttery crust that crumbles in your mouth, revealing a burst of fruity goodness in the center. That delightful experience is what jam bars are all about! With just a handful of simple ingredients, these treats make for a comforting dessert that often reminds us of childhood baking days with family. Whether you’re enjoying them with a cup of coffee in the morning or serving them at a gathering, jam bars are sure to impress.
What Makes Jam Bars a Delightful Treat?
Jam bars are a wonderful fusion of textures and flavors. The combination of a crumbly, buttery base and a sweet, sticky layer of jam creates a balance that keeps you reaching for just one more bite. Here are a few reasons why these bars stand out:
-
Versatile Flavors: You can use any jam or fruit preserves you love. From classic raspberry to zesty orange marmalade, the options are endless. This adaptability means it’s easy to tailor your jam bars to suit your taste preferences or what you have on hand.
-
Simple Ingredients: You only need a handful of pantry staples for these bars, making them an accessible treat for even the busiest of us. Flour, butter, sugar, and jam are the backbone of this delightful dessert, allowing you to whip them up without a trip to the store.
-
Texture Contrast: The contrast between the crumbly crust and the gooey, sweet jam layer is absolutely tantalizing. Each bite offers a satisfying crunch followed by a burst of flavor, drawing you in for more.
-
Easy to Make: Even for novice bakers, jam bars are straightforward to prepare. With minimal fuss and a simple mixing method, you’ll feel like a pro in no time. Bake them up, let them cool, and slice them into perfect squares or rectangles for serving.
In a world where desserts can often be complex and overpowering, jam bars offer a refreshing simplicity. They’re a nostalgic treat that can easily become a staple in your own kitchen, providing comfort and joy in every bite.
Key Ingredients for Jam Bars
Creating delightful jam bars starts with carefully selected ingredients that blend into a treat that’s both satisfying and sweet. Each component plays a vital role in achieving the perfect texture and flavor, making every bite a little piece of heaven.
-
Butter: I prefer using unsalted butter, as it allows me to control the sweetness and depth of flavor. Melting it adds a rich, buttery taste that serves as the base for the crumbly crust and topping.
-
Sugar: A combination of granulated sugar and brown sugar brings out the best in these bars. The brown sugar adds a hint of caramel sweetness, enhancing the overall flavor profile while the granulated sugar creates a light, airy texture in the crust.
-
Flour: All-purpose flour is key in binding the ingredients together. For those needing a gluten-free option, simply swap it out with a gluten-free flour blend, and you’ll still achieve a satisfying texture.
-
Jam: This is where the magic happens! Using a high-quality fruit jam not only adds sweetness but also a vibrant burst of flavor. I often gravitate towards raspberry or apricot for that perfect balance of tart and sweet.
-
Eggs: Just one egg works wonders in providing moisture and binding the crust and topping, ensuring a delightful chewiness that complements the fruit filling.
By thoughtfully selecting these ingredients, your jam bars will not only taste amazing but also provide a comforting experience that’s perfect for any occasion.
Why You’ll Love These Jam Bars
The irresistible aroma of freshly baked jam bars wafting through your kitchen will instantly transport you to a cozy café on a weekend morning. These delightful treats are more than just a simple dessert; they are a warm hug for your taste buds. With their buttery crust and tangy, luscious jam filling, every bite is a balance of textures and flavors that keep you reaching for just one more piece.
Perfect for Any Occasion
Whether you’re hosting a weekend brunch or need a sweet treat for a midday snack, jam bars fit perfectly into any scenario. Their compact nature makes them ideal for packing in lunchboxes or taking along on a picnic.
A Recipe with Endless Possibilities
You have a variety of jam flavors to choose from—from classic strawberry to rich raspberry or even a zesty citrus. You can tailor your jam bars to match the season or even your mood! Each version offers a unique twist, ensuring you never tire of this delightful dessert.
Easy to Make
The best part? These jam bars come together quickly and don’t require any fancy kitchen skills. Just mix, layer, and bake! You’ll love how simple yet rewarding they are, making them a must-try for anyone in search of a deliciously easy recipe that never fails to impress.
Cooking Tips and Notes for Jam Bars
Creating jam bars is a delightful process that can fill your kitchen with warmth and sweet aromas, inviting everyone to gather around. Whether you’re a novice baker or a seasoned pro, these helpful tips will ensure your jam bars turn out fabulously every time.
Choose the Right Jam
The heart of your jam bars is, of course, the jam itself. Opt for thick, high-quality fruit preserves that have no added sugars or fillers. My personal favorite is raspberry for its tartness, but any fruit that you adore can elevate your bars.
Perfecting the Crust
For a buttery, crumbly base, make sure your butter is at room temperature before mixing. This encourages better incorporation into the dry ingredients, resulting in a smoother crust. Don’t overmix the dough; it should just come together for a tender final product.
Layering Technique
Spread the jam evenly over the crust for consistent flavor in every bite. Consider melting the jam slightly in the microwave; this makes it easier to spread and helps it adhere to the crust while baking.
Baking Time
Keep an eye on your jam bars while they’re baking! Ovens can vary, and the perfect gold-brown color usually signals they’re done. If you overbake, you risk losing their delectable chewy texture.
Letting Them Rest
Lastly, allow the jam bars to cool completely before slicing. This not only helps firm up the layers but also gives the flavors a chance to meld beautifully. Enjoy your baking adventure!
Serving Suggestions for Jam Bars
Every batch of jam bars takes me back to summer picnics with friends, where a burst of fruity flavor always stole the show. Let’s keep that vibe alive with some delicious serving suggestions that will elevate your jam bars to the next level.
Pairing with Ice Cream
Imagine cutting into a warm jam bar, the sweet, gooey fruit oozing from between crumbly layers, and the perfect scoop of vanilla ice cream melting on top. This tempting contrast of warm and cold creates a delightful treat that’s hard to resist.
Afternoon Snack with Tea
For a more refined touch, serve your jam bars alongside a cup of your favorite tea. The sweetness of the bars beautifully complements the warm notes of black or herbal tea, making it an ideal afternoon pick-me-up.
Breakfast Treat
Why not enjoy them as part of a cozy brunch? Pair jam bars with Greek yogurt and fresh fruit for a balanced, yet indulgent start to your day. It’s a lovely way to fuel your morning while savoring the sweet goodness.
Creative Dessert Platter
Lastly, consider adding jam bars to a dessert platter featuring assorted treats. Their vibrant colors and delightful taste will stand out among cookies, brownies, and other desserts, making for a visually appealing and tasty spread.
Incorporating these serving ideas can transform your jam bars into anything from a quick snack to an exquisite dessert experience. Enjoy experimenting!
Time Breakdown for Making Jam Bars
Creating delicious jam bars is not just about the end result; it’s about enjoying the process. Let’s break down the time needed so you can plan your baking adventure efficiently!
Preparation Time
Getting everything set up takes about 15 minutes. This includes gathering your ingredients, mixing the dough, and spreading that lovely jam.
Baking Time
Once your jam bars are in the oven, you’ll only need to wait around 25-30 minutes while they bake to golden perfection. The aroma will be irresistible!
Total Time
In just under an hour—from preparation to cooling—you’ll have a warm batch of jam bars ready to impress. It’s a quick and satisfying way to bring a little sweetness into your day!
Nutritional Facts for Jam Bars
When indulging in delightful jam bars, it’s good to understand what you’re putting into your body. Not only do these bars boast a burst of flavor from your favorite fruits, but they also provide some nutritional benefits. Let’s break down the key nutritional aspects to keep you informed.
Calories
An average serving of jam bars contains around 180 calories. This makes them a satisfying treat, combining sweetness with energy without going overboard.
Protein
While not a primary source, each bar typically has about 3 grams of protein. This can provide a small boost to your daily intake, especially if enjoyed as a post-workout snack or an afternoon pick-me-up.
Sodium
In terms of sodium, you can expect about 80 milligrams per serving. This is relatively low, making jam bars a heart-friendly option compared to other sweet snacks, allowing you to enjoy them guilt-free.
Understanding these nutritional facts can help you enjoy your jam bars while still keeping track of your dietary needs!
FAQ about Jam Bars
Making jam bars is not just about following a recipe, but about creating delightful memories. Whether you’re treating yourself, sharing with friends, or finding that perfect snack for busy afternoons, these sweet bars are a must-try. Here are answers to some common questions that might arise while you whip up these delicious bites.
Can I use homemade jam for this recipe?
Absolutely! Using homemade jam not only elevates the flavor of your jam bars but adds a personal touch that store-bought options can’t compete with. Just ensure the jam isn’t too runny, as this can make your bars soggy. A thicker, well-cooked jam will work wonders to create that perfect harmony of sweetness and tartness within your bars.
What’s the best way to store Jam Bars?
To maintain freshness, store your jam bars in an airtight container at room temperature for up to a week. If you want to keep them longer, refrigerating them will extend their shelf life for about two weeks. For a super tasty treat later on, they can be frozen for up to three months. Just make sure to separate layers with parchment paper to prevent sticking!
Can I substitute the flour for a gluten-free option?
Definitely! If you’re looking to make gluten-free jam bars, a 1:1 gluten-free all-purpose flour blend works wonderfully. Just be sure to check the blend has xanthan gum included, as it helps give structure to the bars. You’ll be amazed at how deliciously satisfying your gluten-free creations can turn out.
With these tips, you’re now well-equipped to enjoy your homemade jam bars to the fullest!
Conclusion on Jam Bars
In a world full of snack options, jam bars stand out with their delightful combination of flavors and textures. The perfect balance of buttery crust and fruity filling creates a heavenly treat loved by both kids and adults. Plus, they’re incredibly versatile; use your favorite jam for a customized twist! Made with simple ingredients, jam bars are not only easy to prepare but also a fantastic addition to any gathering, whether it’s a casual brunch or a cozy family evening. So grab your favorite jam and get baking—these sweet delights are sure to become a go-to recipe in your kitchen!
Print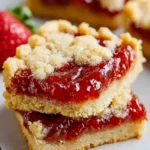
Jam Bars
- Total Time: 50 minutes
- Yield: 16 bars 1x
- Diet: Vegetarian
Description
Delicious jam bars made with a buttery crust and topped with your favorite jam.
Ingredients
Scale
- 1 cup salted butter (at cool room temperature)
- ½ cup powdered sugar
- 2 cups all-purpose flour
- 1 teaspoon vanilla extract
- ½ teaspoon almond extract (optional)
- ¼ teaspoon salt
- ½ cup jam
Instructions
- Preheat oven to 350°F.
- Line an 8×8-inch square baking pan with parchment paper. Set aside.
- In a large bowl, beat butter and powdered sugar together until combined.
- Add remaining ingredients EXCEPT jam, and stir in just until combined.
- Press half of the dough into the prepared pan.
- Prick the dough with a fork.
- Bake for 15 minutes.
- Drop dollops of jam over hot crust, and carefully spread to cover entire crust.
- Top jam with remaining dough.
- Continue baking for 20-30 minutes.
- Let bars cool in pan for at least 3 hours before cutting and serving.
Notes
- Store bars in an airtight container for up to a week.
- You can use any flavor of jam you prefer.
- Prep Time: 15 minutes
- Cook Time: 35 minutes
- Category: Dessert
- Method: Baking
- Cuisine: American
Nutrition
- Serving Size: 1 bar
- Calories: 200
- Sugar: 10g
- Sodium: 150mg
- Fat: 10g
- Saturated Fat: 6g
- Unsaturated Fat: 3g
- Trans Fat: 0g
- Carbohydrates: 28g
- Fiber: 1g
- Protein: 2g
- Cholesterol: 30mg