Follow Me On Social Media!

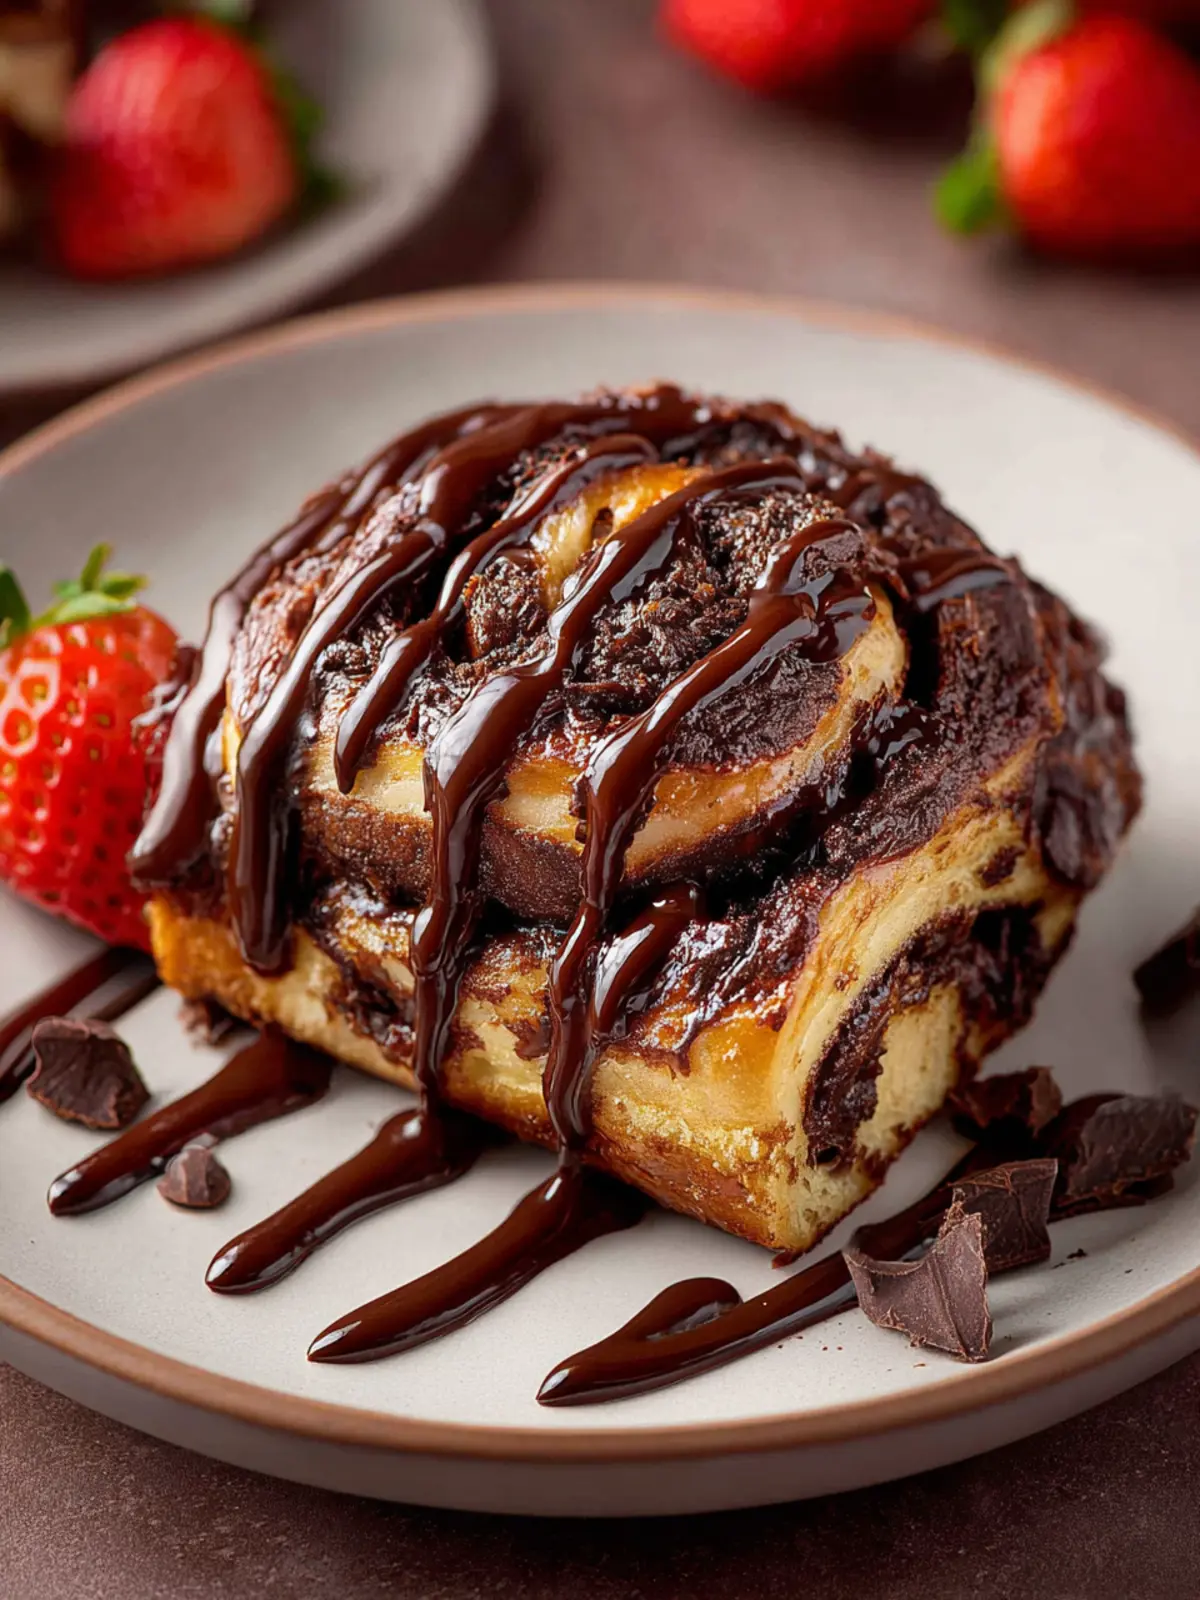
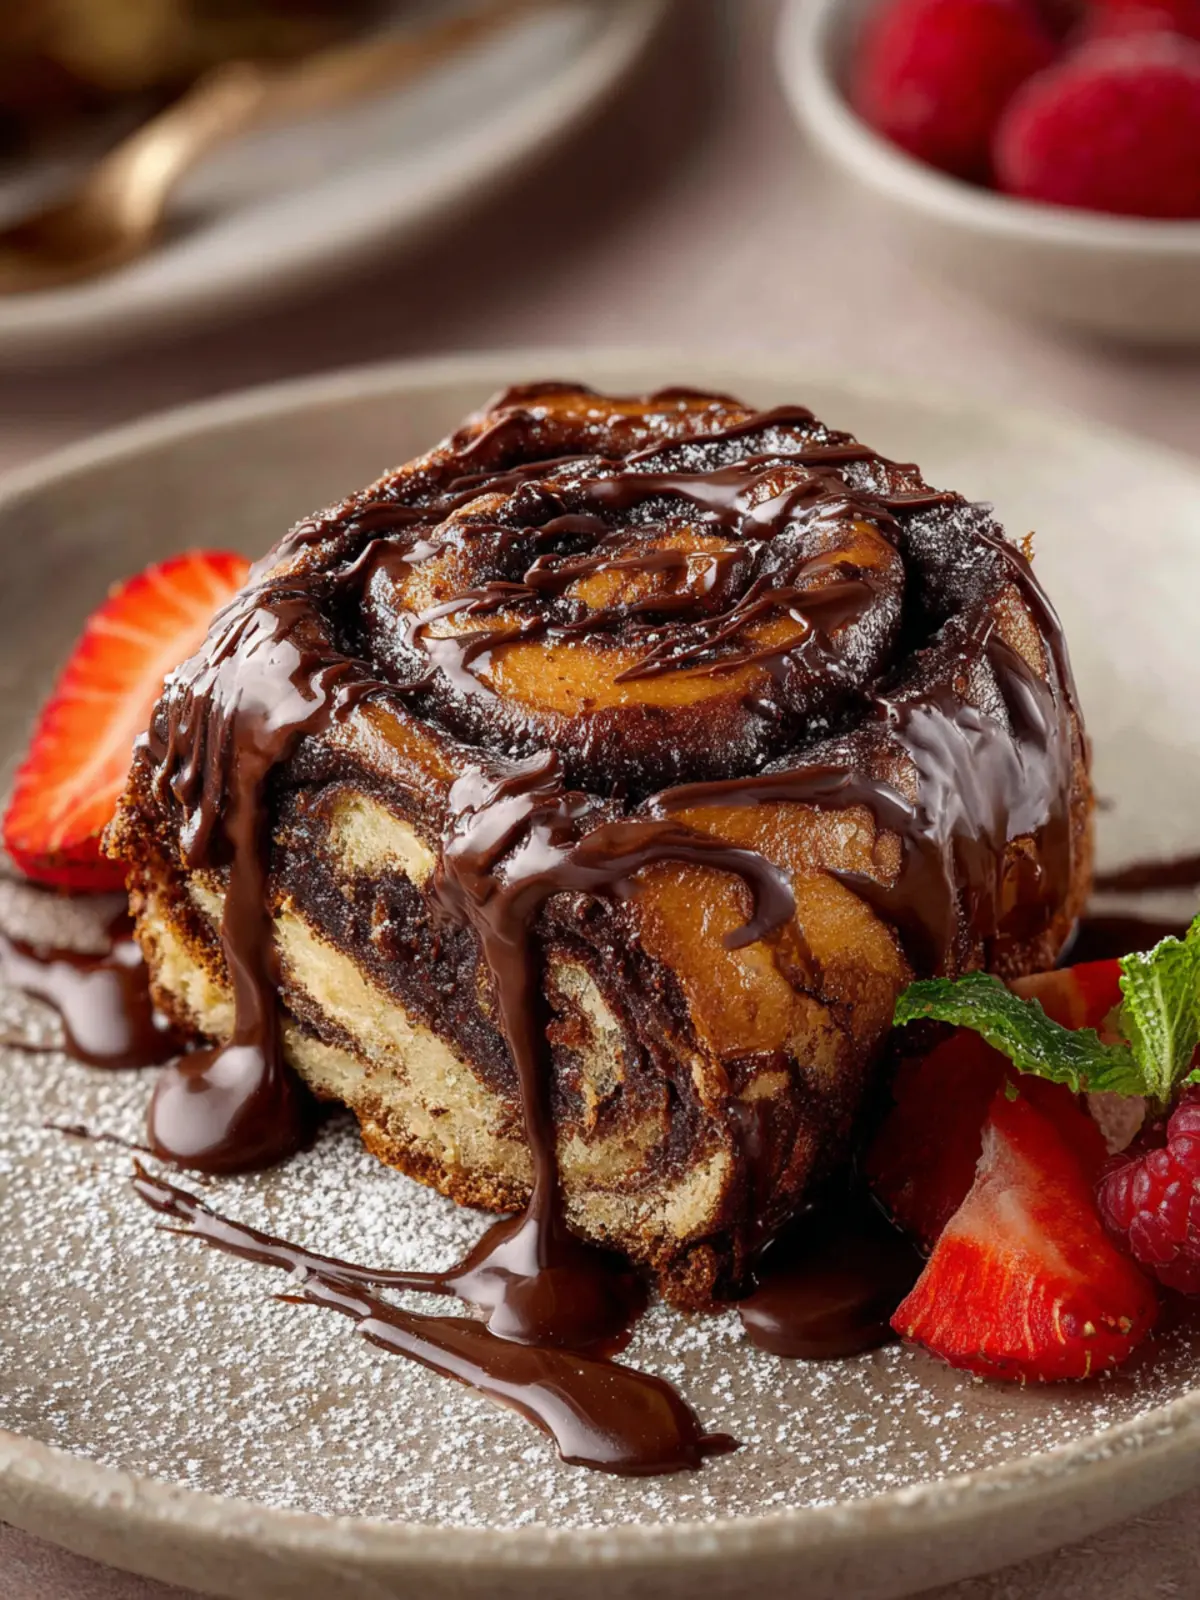
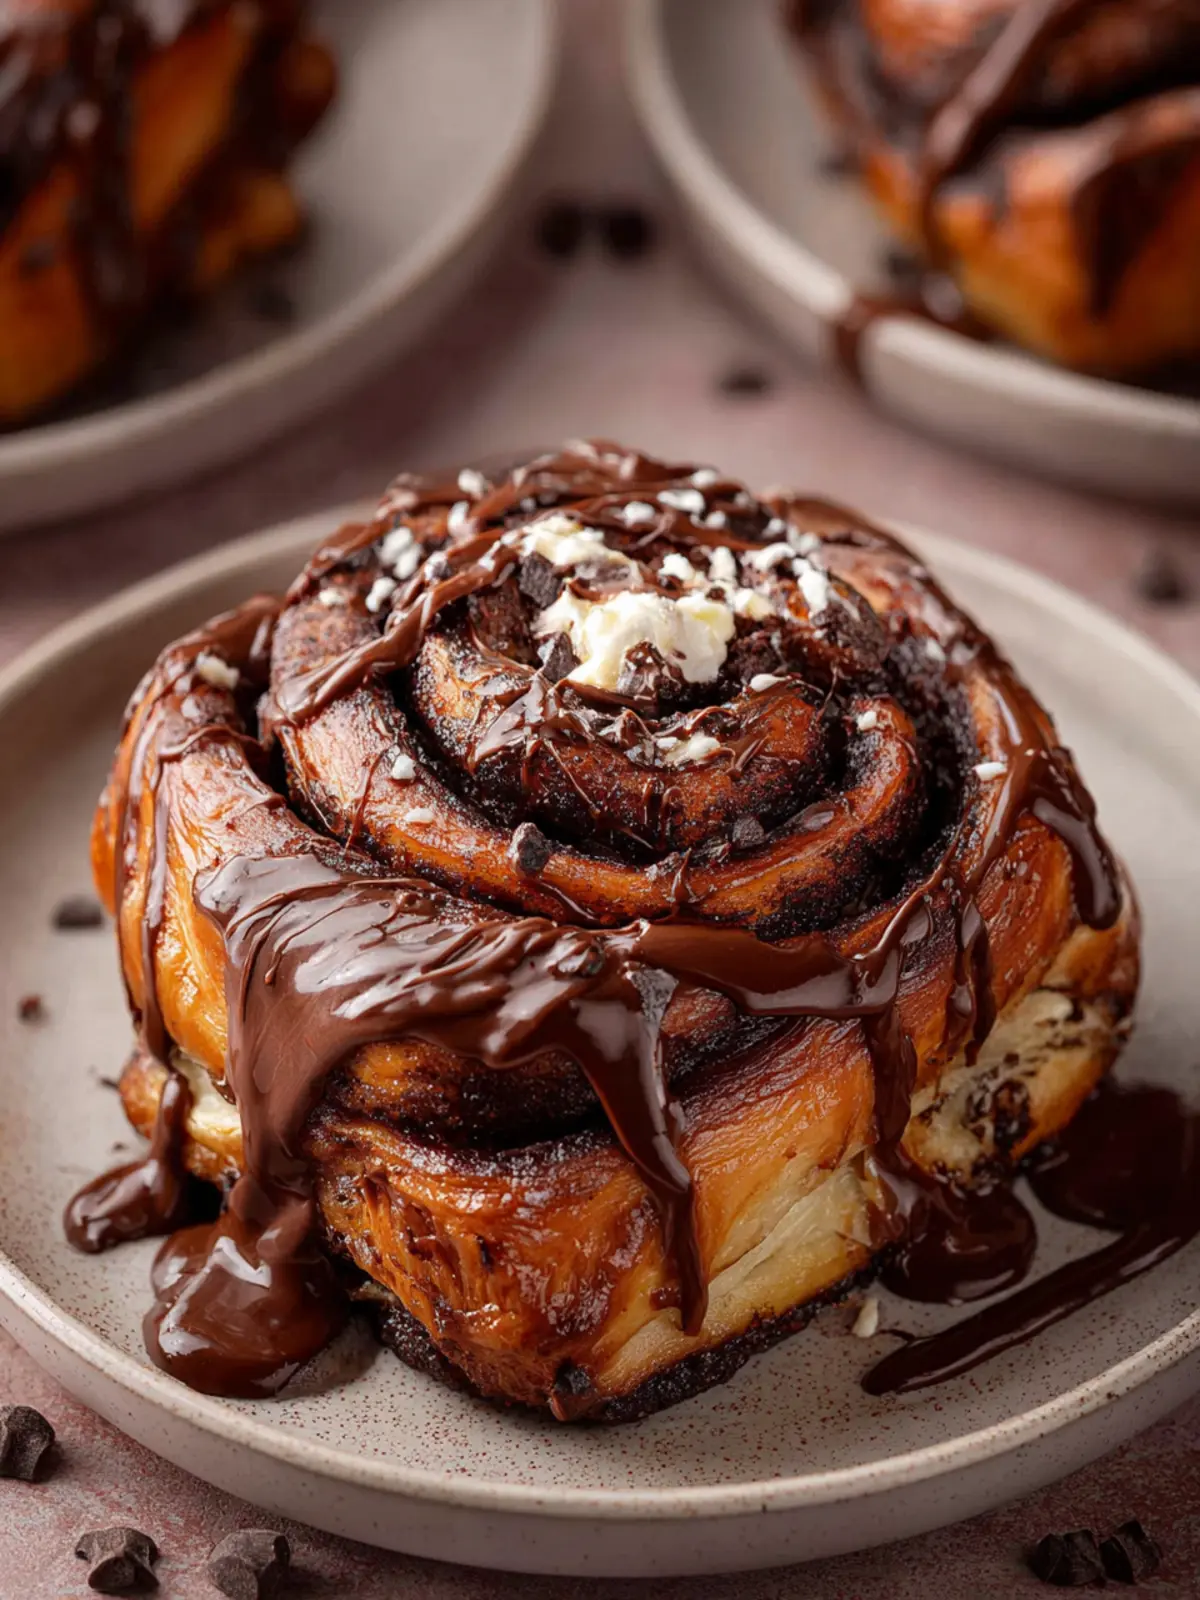
Chocolate Rolls That Are Irresistibly Soft and Gooey!
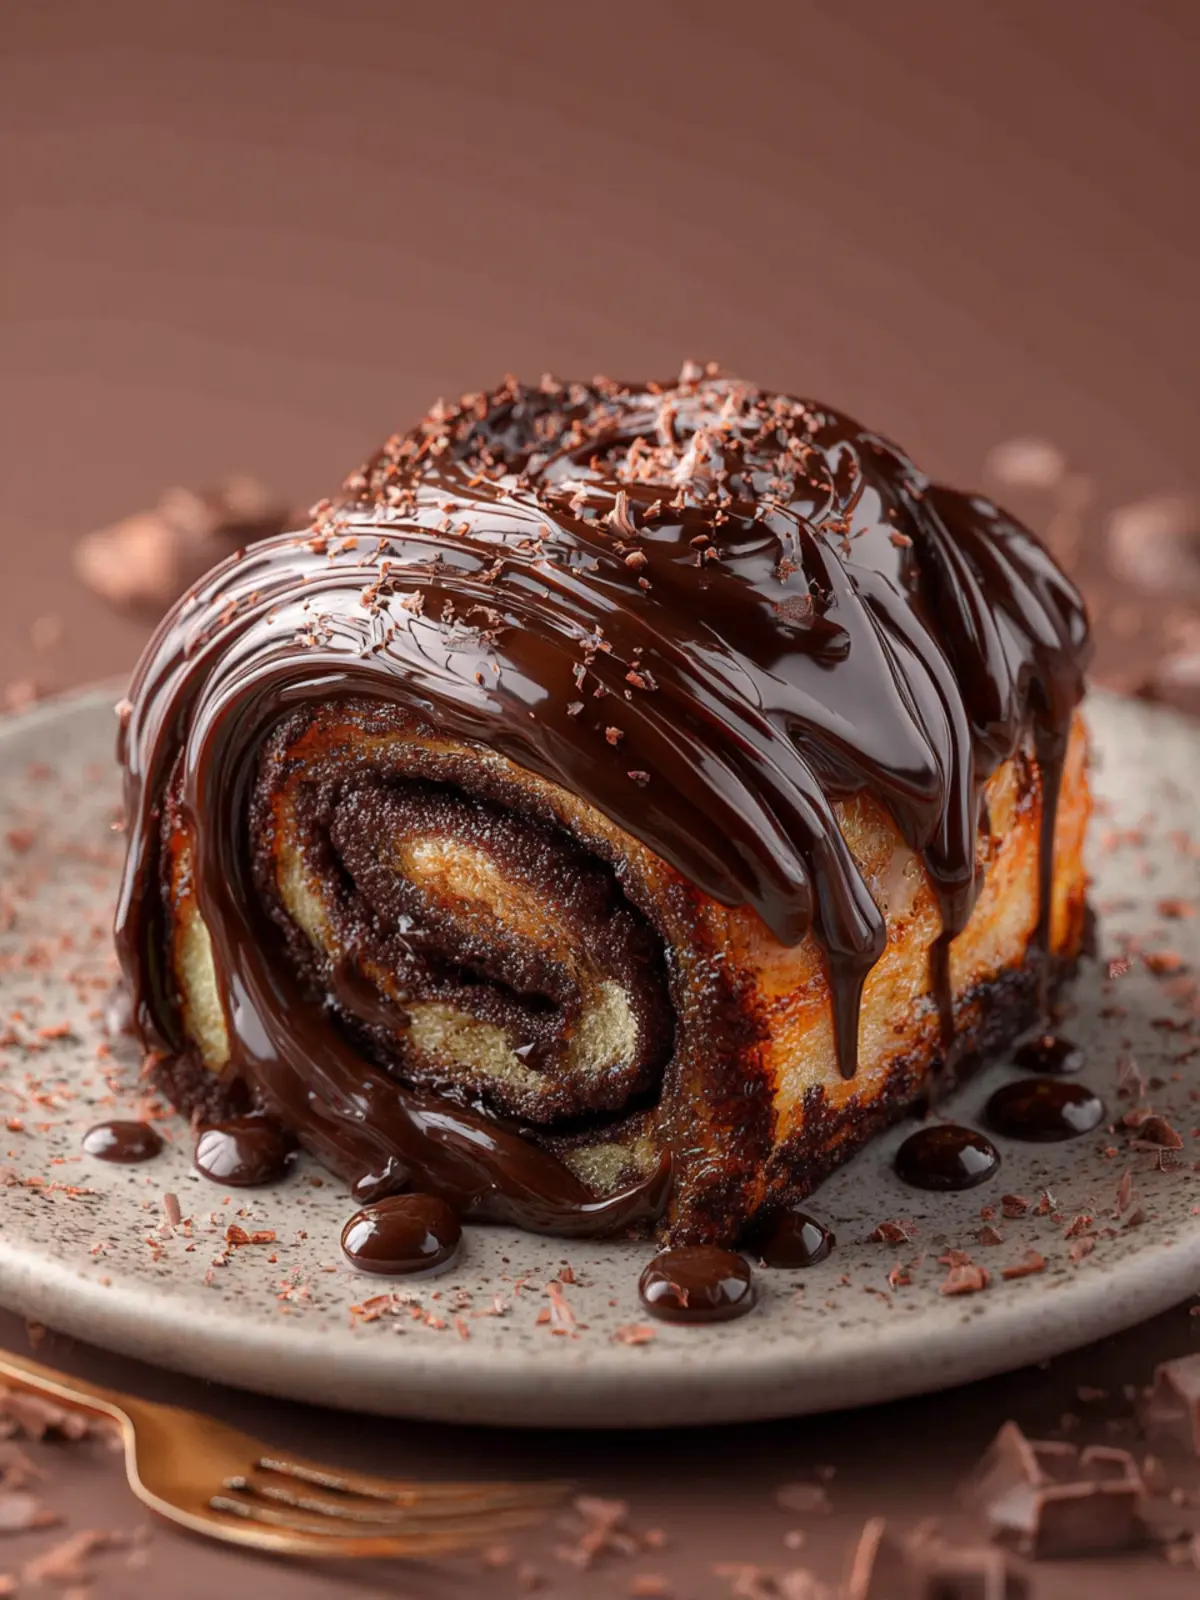
Introduction to Chocolate Rolls
There’s something irresistibly delightful about chocolate rolls that can whisk you away from a busy day to a moment of pure indulgence. Imagine layers of rich, velvety chocolate enveloped in soft, pillowy dough, ready to melt in your mouth with every bite. This dessert isn’t just a recipe; it’s a joyful experience crafted to satisfy the chocolate lover in all of us. Whether served for a special occasion or as a simple treat for yourself on a cozy evening, these rolls are a beautiful way to bring warmth and sweetness into your life.
So, what exactly makes chocolate rolls a must-try? Let’s delve into some of the reasons you’ll want to whip up a batch of these decadent treats.
An Unforgettable Flavor Combination
The beauty of chocolate rolls lies in their harmonious blend of flavors and textures. The soft, slightly sweet dough contrasts beautifully with the rich, creamy chocolate filling, creating a delightful balance that keeps you coming back for more. Texture plays a huge role here; the fluffy exterior delivers a satisfying bite, while the gooey, molten chocolate center provides a decadent surprise. Each roll is a mini masterpiece, and the best part? They’re incredibly simple to make at home!
Perfect for Any Occasion
Whether you’re hosting a brunch, enjoying a quiet afternoon at home, or looking to impress friends at a dinner party, chocolate rolls are versatile enough for any setting. You can slice them into individual servings for an elegant presentation or serve them warm from the oven for a comforting treat. Their visual appeal, with swirls of glossy chocolate peeking from soft dough, is not only tempting but also invites smiles from friends and family alike.
Fun to Customize
Another reason to love chocolate rolls is their adaptability. Want a hint of spice? Add cinnamon or a splash of vanilla. Craving a nutty touch? Incorporate chopped hazelnuts or pecans. The possibilities are endless, allowing you to tailor each batch to suit your preferences or seasonal ingredients.
In the end, chocolate rolls offer more than just a sweet indulgence; they bring joy and creativity to your kitchen. So why not embark on this delightful baking journey? You might just find that they become a staple in your dessert repertoire!
Key Ingredients for Chocolate Rolls
Chocolate: For an indulgent flavor, I recommend using high-quality dark chocolate. Rich and velvety, it melts beautifully to create that decadent filling. If you prefer a sweeter taste, you can opt for semi-sweet chocolate, but ensure it’s still rich to balance with the dough.
Butter: Butter is essential in this recipe. Not only does it add a luscious richness, but it also contributes to a flaky, tender dough. I use unsalted butter, allowing me better control over the sweetness in the rolls.
Sugar: Granulated sugar is key in the dough, providing just the right amount of sweetness. I also sprinkle some sugar over the filling for an extra caramelized touch that enhances the overall experience.
Eggs: Using room-temperature eggs helps to achieve a perfect rise in these chocolate rolls. They add moisture and richness, binding the ingredients together beautifully.
Flour: All-purpose flour works wonders in creating a soft, stretchy dough. For a gluten-free alternative, you can use a 1:1 gluten-free flour blend.
Yeast: A good quality active dry yeast is crucial for this recipe. It helps the dough rise, making the rolls light and airy.
Why You’ll Love These Chocolate Rolls
The moment you take your first bite of these Chocolate Rolls, you’ll realize they are a delightful escape from the everyday routine. Picture this: a warm, fluffy roll oozing with rich chocolate and topped with a glossy glaze that catches the light just perfectly. This irresistible combination not only satisfies your sweet tooth but also brings a sense of comfort and joy.
A Joyful Indulgence
-
Warmth and Comfort: There’s something therapeutic about baking. As the rolls bake, your kitchen fills with a mouth-watering aroma that instantly lifts your mood. This is your cozy moment, a chance to unwind and treat yourself—because you deserve it!
-
Versatile Treat: Whether it’s a lazy Sunday brunch or a special occasion, these Chocolate Rolls fit right in. Pair them with coffee for an indulgent breakfast or serve them warm at your next gathering, and watch them disappear!
Ideal for Sharing
Think of these rolls as the ultimate crowd-pleaser. Their fluffy texture and gooey chocolate filling make them perfect for sharing with friends and family. What could be better than bonding over a beloved baked good? Plus, they’re simple enough for beginners to master, letting everyone join in the fun of baking.
Once you make these Chocolate Rolls, they’re bound to become a favorite in your home. Why resist such a sweet temptation?
Tips for Making Perfect Chocolate Rolls
Crafting the ultimate Chocolate Rolls is a delightful journey that revolves around understanding your ingredients and their roles. Each step in the process can elevate your rolls from good to irresistible!
Choose Quality Ingredients
Using high-quality cocoa powder makes a difference. Opt for Dutch-processed cocoa for a richer flavor, or natural cocoa for a slightly more acidic taste. Don’t skimp on the chocolate chips; they are the heart of your Chocolate Rolls, contributing to a gooey, decadent experience.
Temperature Matters
Bring your eggs and butter to room temperature before mixing. This simple step ensures better incorporation and a smoother batter, leading to fluffy rolls. Also, warm milk or water activates the yeast faster, giving your rolls the perfect rise.
Knead with Care
When it comes to kneading, aim for a smooth and elastic dough. This is a crucial point where many go wrong. Knead just until the dough pulls away from the bowl—too much kneading can lead to tough rolls.
Patience is Key
After shaping your rolls, allow them to rise until doubled in size. This might take longer than you expect, but a longer rise time leads to airier rolls.
Bake to Perfection
Keep an eye on your Chocolate Rolls as they bake. Once they’re golden brown and a toothpick comes out clean, remove them from the oven to prevent drying out. A light brush of melted butter after they cool adds a delightful sheen.
With these tips in your back pocket, your Chocolate Rolls are bound to impress! Happy baking!
Time Details for Chocolate Rolls
When it comes to creating the perfect Chocolate Rolls, timing is everything. Each step plays a crucial role in achieving those irresistible, fluffy treats.
Preparation Time
The initial prep time for these Chocolate Rolls is about 20 minutes. This includes gathering your ingredients, mixing the dough, and preparing any fillings or toppings you desire.
Rising Time
Once the dough is made, let it rise for approximately 1 hour or until it doubles in size. This critical step develops flavor and texture, ensuring your rolls will be light and airy.
Baking Time
Bake your delectable rolls for about 25 minutes. This allows for a golden brown exterior while keeping the inside perfectly soft and gooey.
Total Time
In total, you’re looking at around 1 hour and 45 minutes from start to finish. This makes it a manageable recipe to fit into your busy day, rewarding you with a sweet indulgence at the end!
Nutritional Information for Chocolate Rolls
When indulging in Chocolate Rolls, understanding their nutritional content can enhance your experience. These delicious treats can provide a satisfying bite without excessive guilt.
Calories
Each serving of these Chocolate Rolls contains approximately 250 calories. This makes them a delightful addition to your dessert table without overwhelming your daily caloric intake.
Protein
Surprisingly, these rolls also pack a protein punch, offering around 4 grams per serving. While they’re primarily a sweet indulgence, they still contribute a bit to your daily protein needs.
Sodium
With about 180 milligrams of sodium in each roll, they remain fairly moderate in salt content. This allows you to enjoy the sweet flavors without worrying too much about sodium intake, making them a great treat for gatherings or a cozy night in.
FAQs about Chocolate Rolls
Delving into the world of Chocolate Rolls can feel like stepping into a comforting embrace of sweetness and indulgence. Still, even the most enthusiastic bakers have questions. Let’s tackle some common inquiries to ensure your experience is as seamless as possible.
How can I make my chocolate rolls fluffier?
To achieve those irresistibly fluffy Chocolate Rolls, start by ensuring your yeast is fresh and active. If you’re using instant yeast, you can incorporate it directly into the dry ingredients. Secondly, using room temperature ingredients, including butter and eggs, can help create a smoother dough that rises beautifully. Lastly, never skip the kneading process; it develops gluten, helping your rolls rise and become airy.
What can I do if my dough doesn’t rise?
If your dough seems stubborn and refuses to rise, you may be dealing with yeast that’s lost its potency or incorrect proofing temperatures. Make sure your warming environment (around 80°F or 27°C) isn’t too hot or cold. If you suspect the yeast isn’t working, consider starting over with fresh yeast. Additionally, check that you’re not using too much salt, as it can inhibit yeast activity.
Can I use dark chocolate instead of semi-sweet?
Absolutely! Substituting dark chocolate for semi-sweet in your Chocolate Rolls will impart a richer, deeper flavor. Keep in mind that dark chocolate typically has a lower sugar content, so you might want to adjust the sugar in your recipe slightly to maintain a balanced sweetness. Your rolls will emerge decadent and delightful, showcasing a more intense chocolate experience.
Feel free to explore these tips, and soon you’ll be enjoying moist, fluffy Chocolate Rolls straight from your oven.
Conclusion on Chocolate Rolls
Creating Chocolate Rolls is more than just following a recipe; it’s about crafting a delightful experience that brings warmth to your kitchen and joy to your table. Once you’ve rolled out, filled, and baked these treats, you’ll find that the rich chocolate aroma wafting through your home is just as satisfying as the first bite. Whether you’re serving them at a gathering or enjoying them with a cup of coffee, these rolls are a delightful way to indulge. Embrace the process, share a roll or two with friends, and savor the delicious moment! Your taste buds will thank you for it.
Print
Cinnamon Rolls
- Total Time: 2 hours
- Yield: 12 rolls 1x
Description
Delicious homemade cinnamon rolls with a rich filling and creamy glaze.
Ingredients
Scale
- 1 cup (240 ml) milk (lukewarm (about 120-130°F))
- 2 ¼ teaspoons instant yeast
- ⅓ cup (100 g) granulated sugar (divided)
- 2 large eggs (room temperature)
- 6 Tablespoons (85 g) unsalted butter (melted and slightly cooled (not hotter than 110F))
- 4–5 cups (480 – 600 g) all-purpose flour (spooned and leveled)
- 1 teaspoon salt
- ½ cup (113 g, 1 stick) unsalted butter (softened to room temperature)
- ½ cup (64 g) powdered sugar
- ¼ cup (21 g) Dutch-process cocoa powder
- ½ teaspoon vanilla extract
- 4 ounces semi-sweet or bittersweet chocolate (chopped)
- 1 cup (113 g) powdered sugar (for glaze)
- ¼ cup (21 g) Dutch cocoa powder (for glaze)
- ½ teaspoon vanilla extract (for glaze)
- 3–4 Tablespoons milk (or heavy cream, for glaze)
Instructions
- Proof yeast: In your stand mixer, or large bowl, stir together the warmed milk, yeast, and 1 teaspoon of the sugar. Let sit for 5-10 minutes until the yeast mixture becomes foamy and bubbly.
- Make dough: In a bowl of your stand mixer with a paddle attachment, add in the eggs and melted butter and stir to combine. Then add in the rest of the sugar, flour, and salt, and stir to combine until a shaggy dough comes together.
- Knead the dough: Fit the mixer with a dough hook attachment, and knead at medium speed for 6-8 minutes. If the dough is super sticky, add additional flour a little at a time if needed. If you are kneading the dough by hand, then turn the dough out onto a lightly floured surface and knead for 8-10 minutes by hand.
- Let the dough rise: Lightly grease a large bowl, and place dough into the bowl, turning once to coat. Cover the bowl and allow it to rise until doubled in size, about 1 to 1 1/2 hours.
- Prepare Pan: Grease a 9×13 baking pan with non-stick spray or butter.
- Make filling: Place butter, sugar, cocoa, and vanilla in a mixing bowl and beat until combined. It should be a very soft paste that you will be able to spread easily.
- Roll out the dough: Turn the dough out onto a lightly floured surface, and roll out the dough into an 18×12 inches rectangle.
- Spread filling: Spread the dough with the softened butter mixture leaving about a ½-inch border at the top long edge. Sprinkle the chopped chocolate over the butter, pressing down lightly to adhere.
- Cut rolls: Starting on the long edge with filling, roll up the dough tightly into a log. Pinch the dough to seal. Using a serrated knife cut the log into 12 equal rolls.
- Place rolls into pan spiral side up: Cover the baking dish and let rise in a warm, draft-free place for 45 minutes until the rolls are slightly puffy, and nearly doubled in size.
- Bake rolls: Near the end of the second rise time, position a rack in the center of your oven and preheat the oven to 350°F/177°C. Bake rolls in the preheated oven for 30-35 minutes until golden brown. Let cool in the pan for about 20 minutes, then spread glaze on.
- Make the glaze: In a small bowl whisk together the powdered sugar, cocoa powder, vanilla, and milk. Adjust the consistency if needed by adding a bit more milk. Spread on top of the cinnamon rolls.
Notes
- Ensure that the milk is not too hot when proofing yeast to avoid killing it.
- Do not over-knead the dough; otherwise, it may become dense.
- Using a thread to cut the rolls ensures a cleaner cut.
- Prep Time: 15 minutes
- Cook Time: 35 minutes
- Category: Dessert
- Method: Baking
- Cuisine: American
Nutrition
- Serving Size: 1 roll
- Sugar: 7g
- Sodium: 150mg
- Fat: 8g
- Saturated Fat: 5g
- Carbohydrates: 43g
- Protein: 3g
- Cholesterol: 40mg